








Showing posts with label Organize. Show all posts
Monday, April 23, 2012
Laundry/Closet Organization and Labeling
If there's one thing about me, it's that I am very, very picky about my bedroom. Everything has to be in perfect order and organized, otherwise I go crazy. Therefore, today I decided to dedicate a complete post to my laundry and closet order.
What I do:
-I separate my laundry into 3 bags: Whites, Darks, and Other. I've had jinxed experiences with washing different color schemes together, so I'm super OCD about what I launder with what.
-When I take something out of my closet to put into my laundry bags, I hang a tag on the hanger to let myself know that the item is currently in the laundry. I label my hangers with what clothing item is on which hanger, so I know exactly which piece is missing. The tags look a little like this:
To make:
1) Copy/paste the above label onto a word document and print out on card stock paper. photo paper, or "stiffer" paper to prevent bending and rips.
2) Use a paper cutter to cut out into the shape of a square.
3) Hole punch the top and loop a piece of string through the hole.
You're done! Happy organizing.
Sunday, April 22, 2012
Organizing Makeup Brushes
Before, my makeup brushes were nearly always scattered and misplaced. As a result, the bristles often got worn and I found myself rushing to the store to get new brushes more than often. After I developed an organizing system for my brushes, I never misplaced them and they were always within a fingertip's reach when I needed them. More importantly, my wallet stayed fuller for longer periods of time. Here are a couple tips to organizing your makeup brushes and developing and organizational system for your beauty supplies...
1) Get a container.
Just like anything else, you have to start from the base. In this case, it's the container that holds your brushes. I recommend acrylic cups (like the ones pictured above) that you can get at the dollar store. Cups keep your brushes upright as opposed to bins, where your brushes are placed horizontally. When brushes are placed in bins, they catch germs and bacteria easier and also bristles might get ruined.
2) Fill up the bottom.
If you don't have a full set of brushes or the width of your cup is too big, consider placing coffee beans or rocks at the bottom to hold your brushes upright.
3) Wash your brushes regularly.
Nothing's worse than having a full 20 set of brushes, only to have them infected with bacteria. Wash your brushes regularly by the cup to prevent germ outbreak.
4) Personalize your brushes.
This especially comes in handy when you're trying to tell set-from-set or have a fixed brush cleansing schedule! Click here for a quick DIY follow-up post on personalizing your brushes.
Happy Sunday!
DIY Makeup Brush Personalization
I've always had an issue with having a cluster of makeup brushes and not being able to tell them apart. The worst part about this fiasco was when I didn't know which ones needed to be cleaned and which ones didn't. Here's a quick DIY idea that you can use to personalize your makeup brushes and keep different sets apart!
You Will Need:
-Nail Polish
-Yellow Masking Tape
1) Apply a ring of masking tape around your brush. You should apply the tape 1-3 centimeters from the bottom. Make sure it's secure - you won't want nail polish bleeding through in the latter steps!
2) Carefully, use any color nail polish and paint the tip of the brush. You won't have to worry about "staying inside the lines" because the tape is there to make a perfect and pretty straight line without hassle!
3) Allow 30 minutes to 1 hour for the nail polish to dry completely. To allow the tip of the brush to dry without touching any surface, place the brush on a table and leave the tip hanging out.
Enjoy your personalized makeup brush set!
PS - If you're looking for more than just colored tips and would prefer to customize the whole brush instead, look here for a pretty tutorial!
Tuesday, April 17, 2012
Keeping Ear Buds Untangled
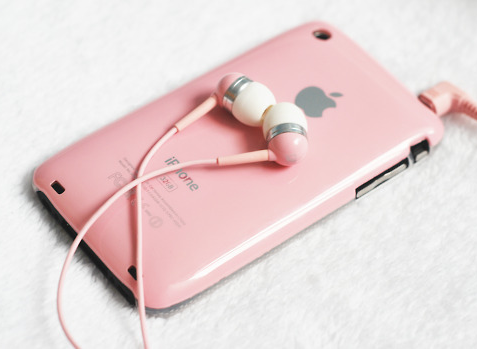
Although I have heard some great organizational tips for storing ear buds (my favorite is the Q-Tips container idea by Jen from iHeart Organizing!), I've never really heard of ways to keep them untangled. I feel that this is an even greater problem than storing them, because every time I pull out my iPod to listen to music, I find myself spending 15 minutes untangling my ear buds just so they can be the proper length! Not to mention the hassle when your traveling.
Here's a solution to keeping them untangled: Cover the wiring! The best (and most professional) way is to get them clear-coated with plastic. Unfortunately, this isn't something you can just pick up at the store and apply it when you get home - you need to take it to a professional ear bud manufacture, which also requires a lot of money.
I experimented a little and came to the happy conclusion on keeping your ear buds untangled with this little DIY project. Instead of plastic, why not coat it with string? You can go to the dollar store or any craft store to pick up colorful string (the kind used for making friendship bracelets). Wrap it around the wiring, cut it off once you get to the end, and carefully glue it with a tiny dab of hot glue. (Make sure it doesn't touch the wiring, though! That could be bad.) If you don't like the unfinished look of hot glue on the end, you could even go as far as taping a small strip of masking tape to the top.
Happy un-tangling and and enjoy!
PS - We're hosting our very first giveaway here on Pinkscript very, very soon! Stay tuned for more details.(:
Subscribe to:
Posts (Atom)